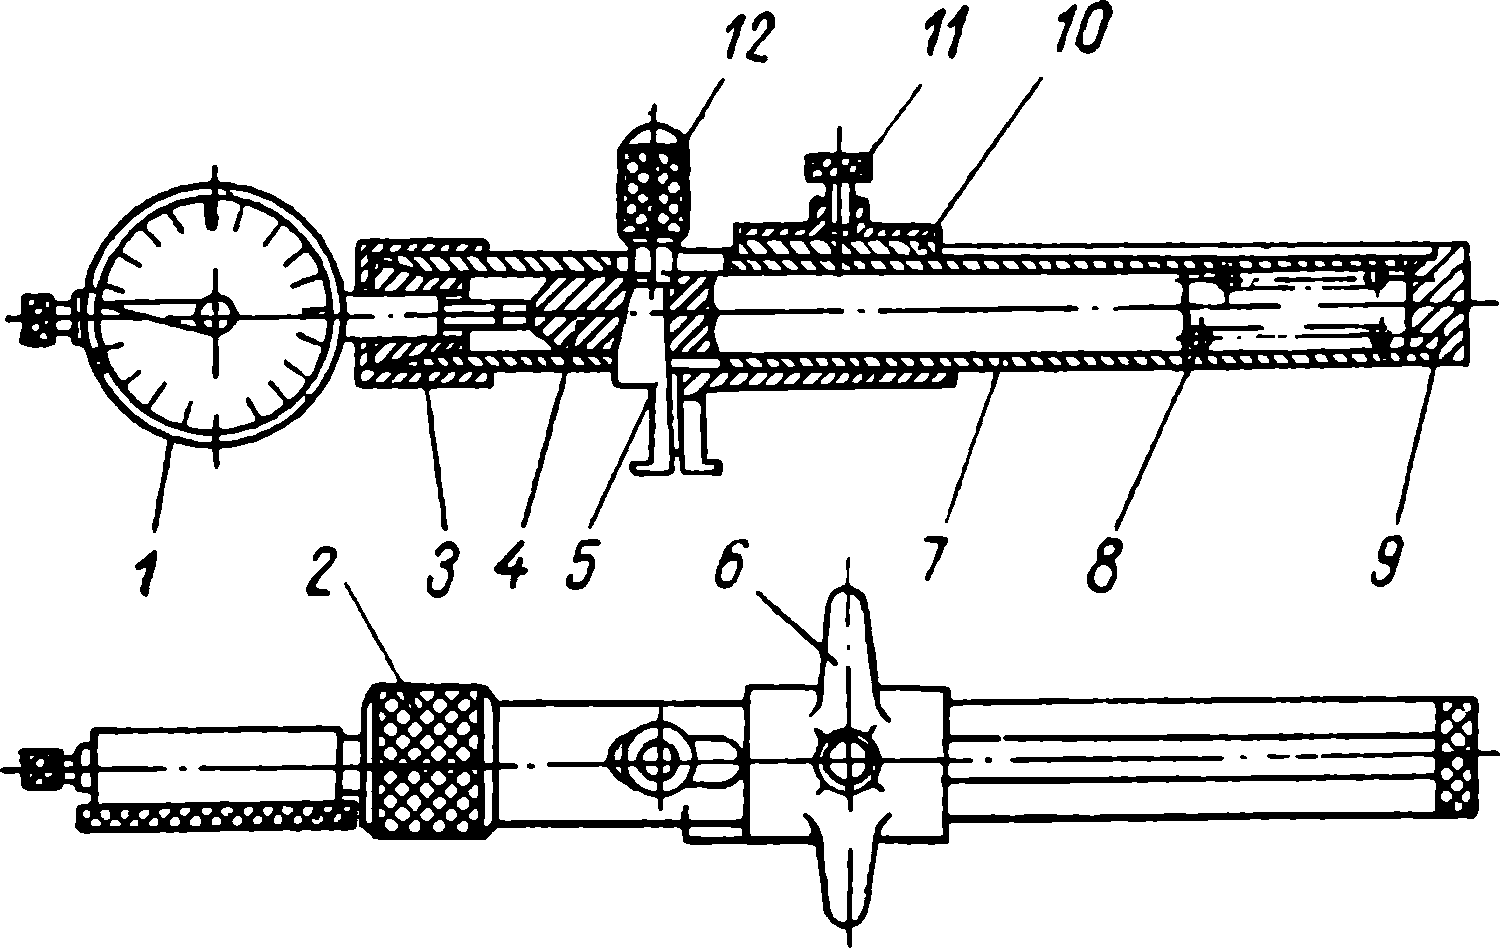
Bore gauge with an indicator head
A bore gauge with an indicator head, developed by innovators A. Vasiliev and N. Lapshin, is used to measure the diameters of annular grooves. This bore gauge is a specially designed design.
This bore gauge can measure hole diameters and groove widths (10–70 mm) with an accuracy of 0.01 mm.
The bore gauge consists of an indicator 1 secured in a housing 7 by means of a collet 3 and a nut 2. The indicator rod contacts a plunger 4, in which a measuring tab 5 is secured by means of a wedge. The tab is tightened by means of a handle 12, which is screwed onto the threaded part of the tab 5. The second jaw is made integral with the clamp 6. The clamp can move along the axis of the housing 7 and is prevented from turning around the housing by a key 10. The clamp is locked in the desired position by a screw 11. The movement of the clamp together with the button is ensured by the presence of a groove in the housing. Plunger 4 is spring-loaded by spring 8, which is located in the housing between the plunger end and plug 9. The jaws are designed as two overlapping plates (as is the case with lightweight calipers with a measurement accuracy of 0.1 mm, manufactured by the Kalibr plant). The bore gauge is set to the required size using a standard 16 micrometer bracket or a block of end gauges clamped in a clamp. When adjusting, it is necessary to apply some tension to the indicator (0.1-0.5 mm).
This bore gauge has a more rigid design than a caliper-only combination and can therefore ensure greater measurement stability. However, the presence of sliding joints requires very careful manufacturing of the parts and assembly of the instrument. It should also be remembered that when using these instruments, the size is measured by the largest reading on the indicator needle. Furthermore, when measuring, the legs must be positioned perpendicular to the axis of the hole or groove being measured. If they are misaligned, the indicator will show a larger dimension than the actual size.
***
